How to Set Up a Charging Station for Devices at Home

Setting up a dedicated charging station for your devices can simplify your daily routine and help keep your living space organized. Whether you have smartphones, tablets, smartwatches, or Bluetooth accessories, having one central spot to charge and store everything can save you time and reduce clutter. In this post, we’ll guide you through easy steps to create an efficient and neat charging station at home.
Why Create a Charging Station?
With multiple devices in use, cables often end up tangled or scattered around the house. A charging station:
– Centralizes your devices for easy access
– Keeps cables tidy and reduces clutter
– Protects your gadgets by minimizing accidental drops
– Makes it easier to remember to charge all your devices
Whether your station is in the living room, bedroom, or home office, the setup can be customized to your space and device needs.
What You’ll Need
Before you start, gather these basic items:
– Power strip with surge protection (multiple outlets)
– Charging cables compatible with your devices
– Cable organizers (clips, ties, or sleeves)
– A sturdy box, tray, or docking station
– Labels (optional, for different cables or devices)
– Device stands or holders (optional for better display)
With these supplies, you can tailor a setup that works for your devices and space.
Step 1: Choose the Right Location
Pick a spot that is easily accessible and near a power outlet. Common places include:
– A desk or table in your home office
– A side table in the living room or bedroom
– A kitchen counter
Make sure the surface is flat and provides enough room for all your devices and cables. Good lighting helps you manage devices comfortably.
Step 2: Select a Power Source and Charging Units
Use a power strip with surge protection to prevent damage from power spikes. This also lets you plug in several chargers:
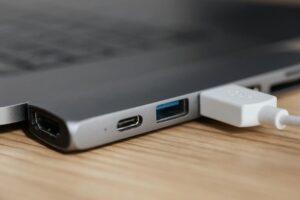
– Use original chargers or certified fast chargers for best performance.
– Consider a multi-port USB charging station to reduce the number of plugs.
– If you have many devices from the same brand, charging docks designed for multiple gadgets can simplify your setup.
Step 3: Organize Your Cables
Managing cables is key to a clean station:
– Label your cables if you have multiple similar chargers.
– Use cable clips or ties to bundle excess length and prevent tangles.
– Cable sleeves can hide multiple wires together for a neat look.
– Velcro ties allow easy adjustments if you add or remove devices.
Keeping cables under control prevents frustration and protects your devices’ ports.
Step 4: Arrange Devices and Accessories
Comfort and convenience matter:
– Use stands or holders for tablets and phones to keep screens visible and accessible.
– Place smaller accessories like earbuds or smartwatches in separate compartments or small containers.
– Avoid stacking devices directly on top of one another to prevent overheating.
Try different arrangements until you find one that fits your routine best.
Step 5: Maintain Your Charging Station
To keep your station working well:
– Clean it regularly to remove dust.
– Check cables occasionally for wear or damage.
– Unplug devices once fully charged to conserve energy.
– Adapt the setup as your device collection changes.
Regular upkeep ensures safety and prolongs device life.
Bonus Tips for a Perfect Charging Station
– Use wireless chargers for compatible devices to reduce cable clutter.
– Add a small label or digital reminder to encourage charging daily.
– Incorporate charging station furniture like a small shelf or cabinet for a stylish look.
– Use a power timer to automatically cut power after specific hours.
Conclusion
A well-designed charging station not only keeps your devices powered but also enhances your home organization. By following these steps, you can create a simple, efficient charging hub tailored to your needs. Start with choosing a good location, gather the right equipment, organize your cables thoughtfully, and arrange your devices neatly for an enjoyable experience every day.
Happy charging!